I reverse engineered a Chef’sChoice® Professional Sharpening Station® Model 130 for a team project in a class. Our goal was to improve the design by making it more efficient to manufacture and assemble.
-
Reverse Engineering a Knife Sharpener

The Chef’sChoice® Professional Sharpening Station® Model 130
We started with a full disassembly of the product. We separated each component for analysis, documenting as we went along.
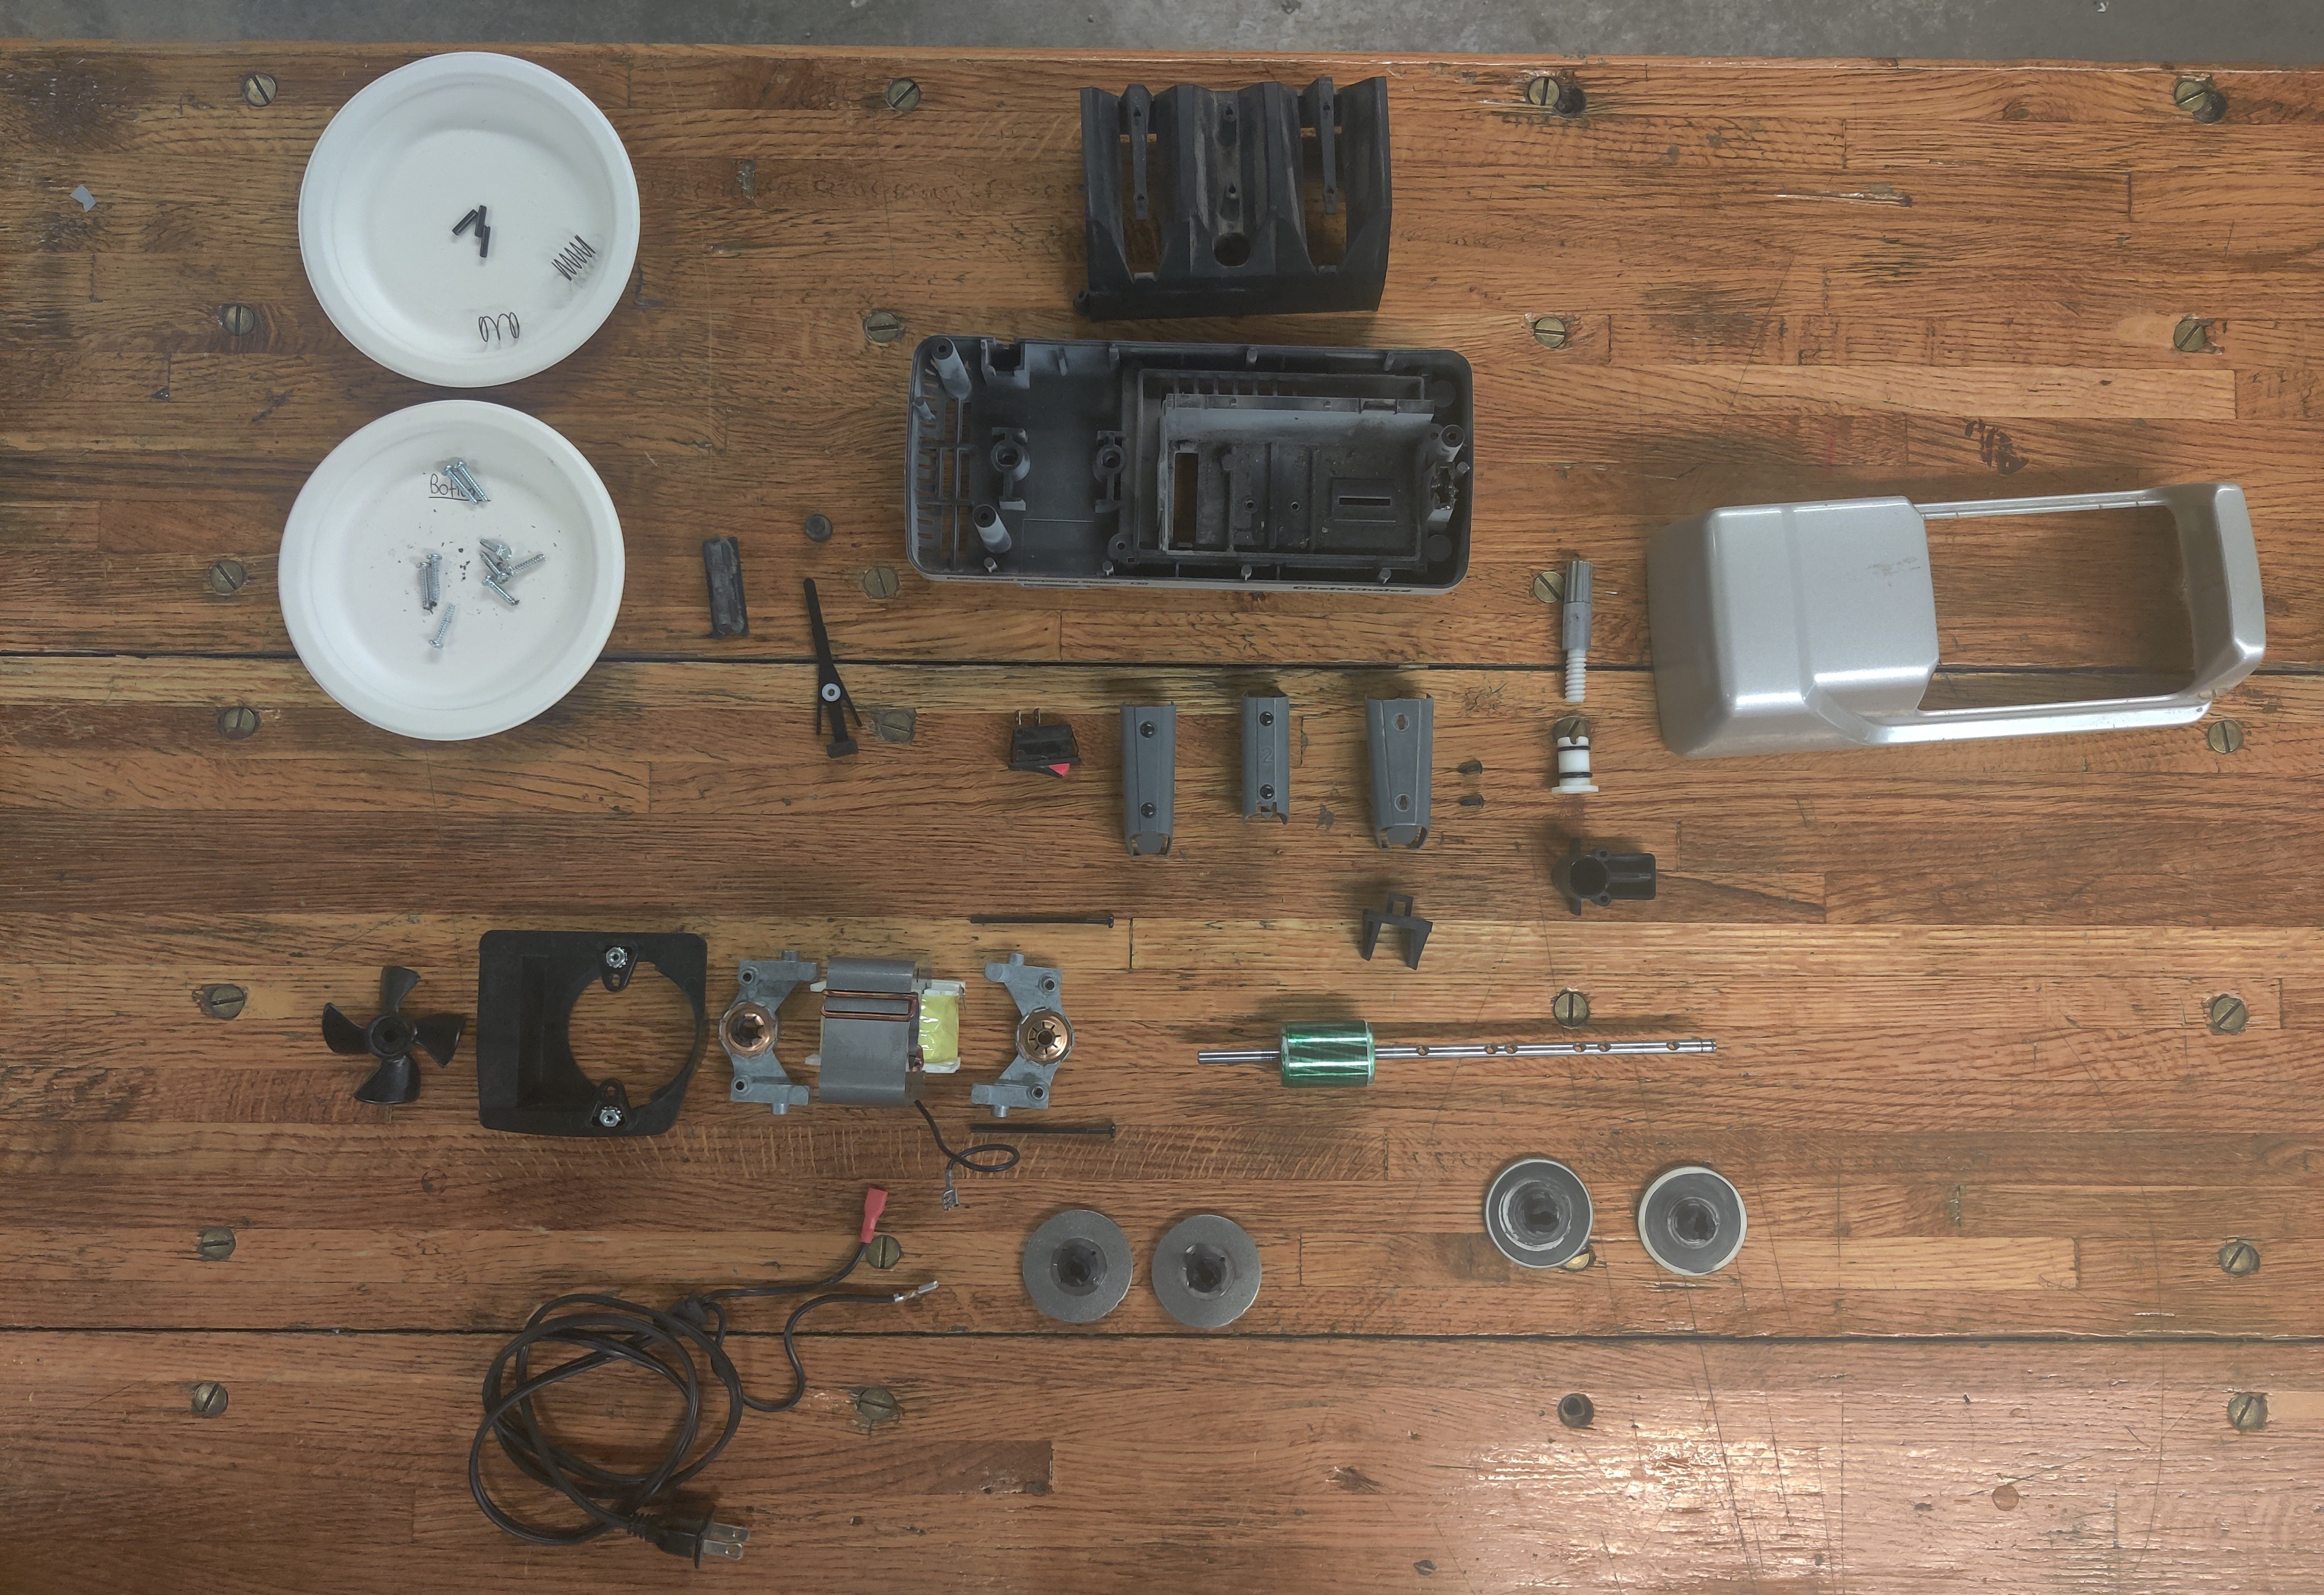
Disassembly
We created several diagrams to demonstrate the functionality of the design, including the "glass box" diagram on the right. Each box inside the gray enclosure represents a component of the design. Each box outside represents a potential input or output. The arrows connecting them represent some action taken by the user or product.
Some are fairly straightforward, like a knife going into one of the sharpening stages and coming out sharp. The glass box diagram also visualizes operations like cleaning the polishing wheel and removing metal shavings.

A "glass box" diagram of the knife sharpener.
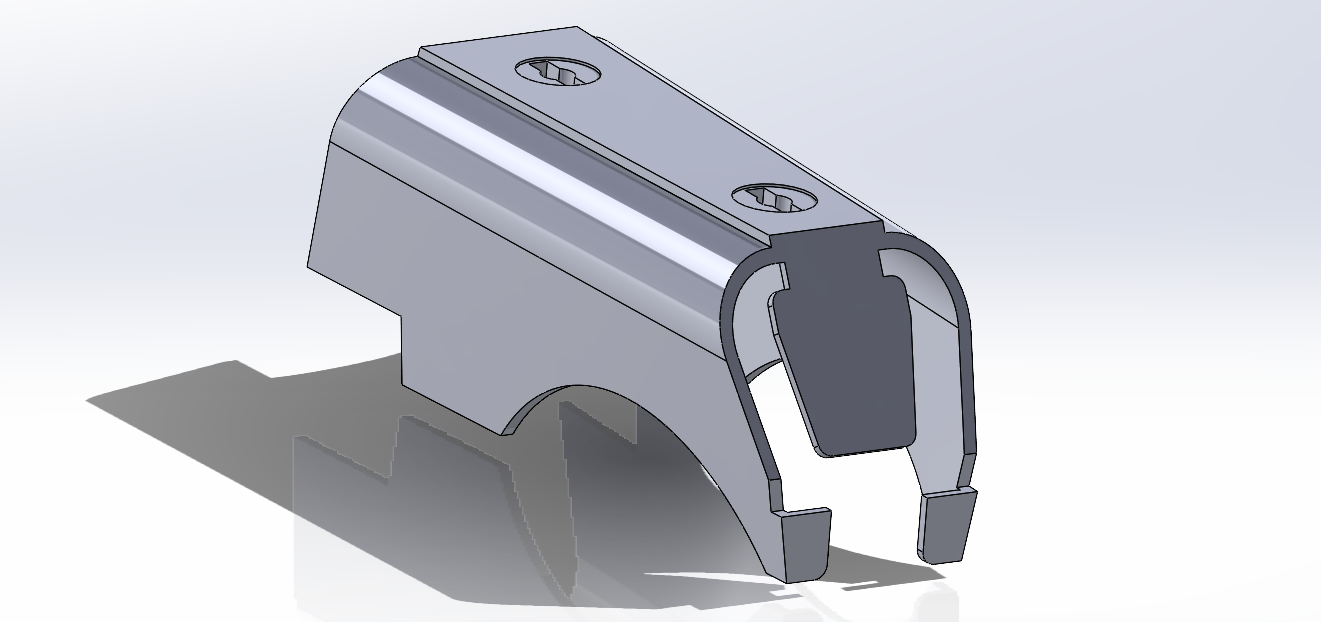
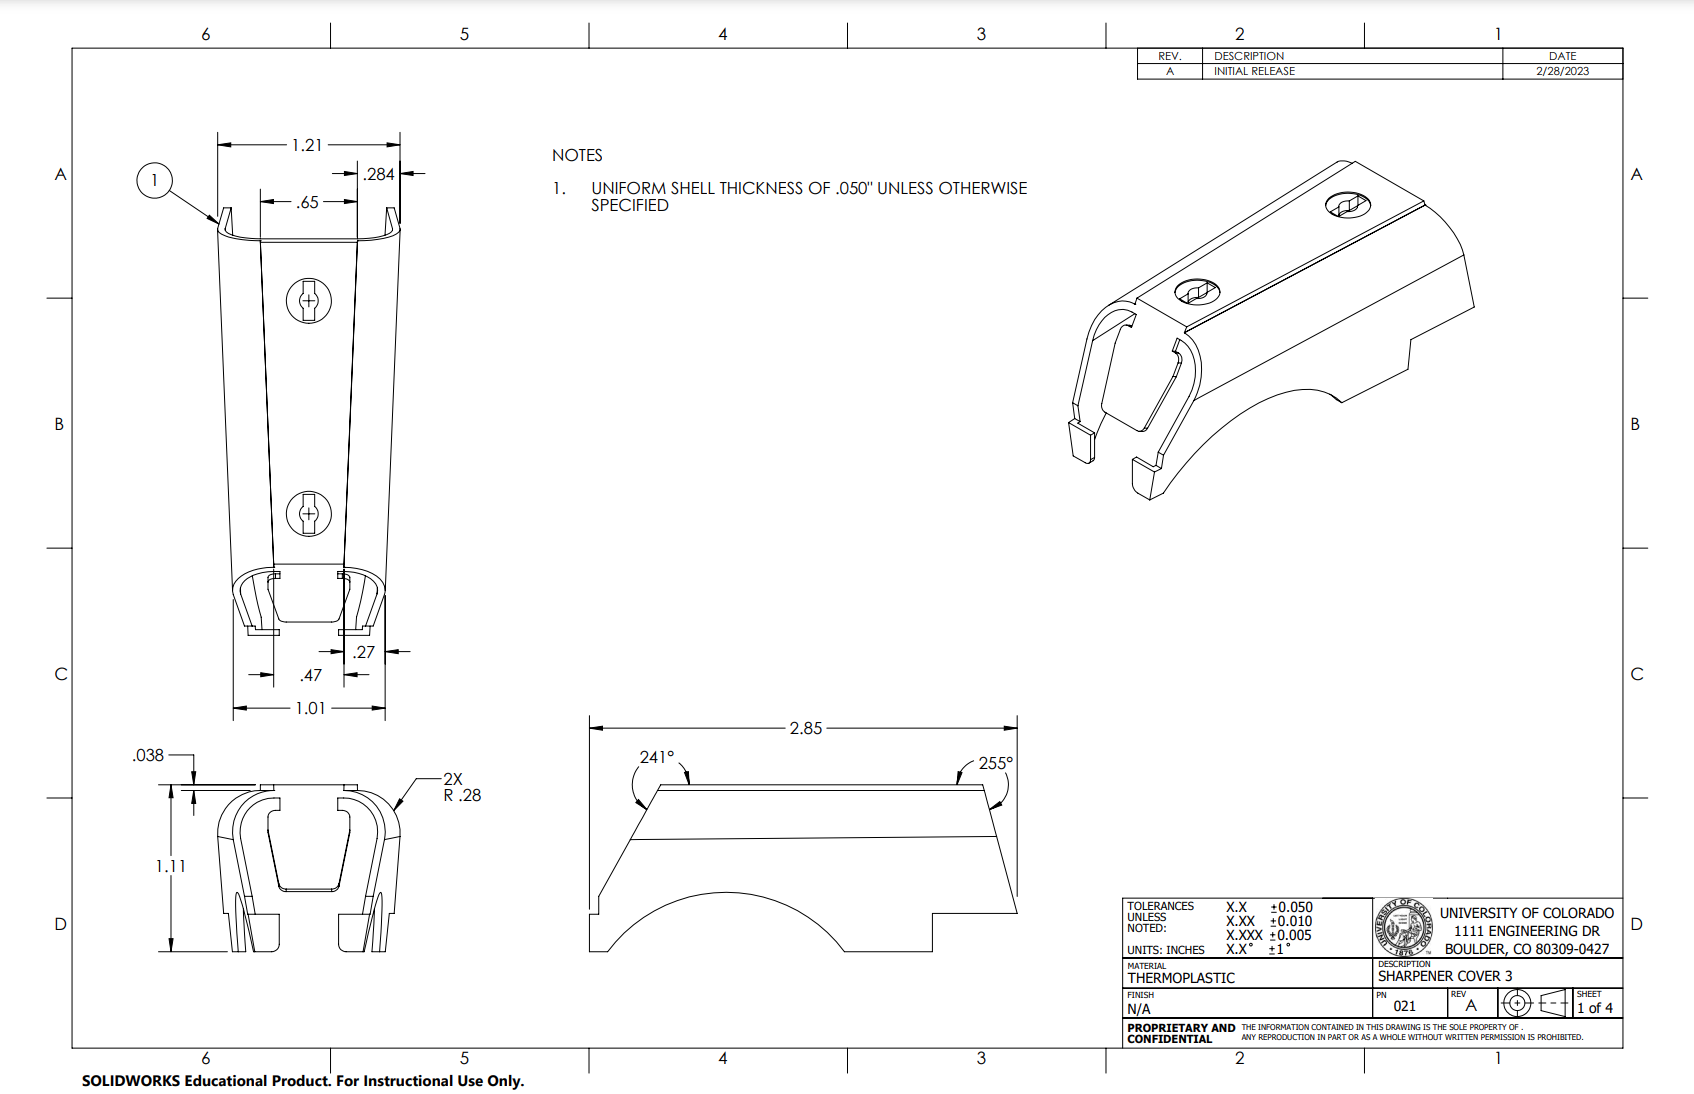
We then modeled and drafted engineering drawings for each component in the assembly. To measure my parts I used calipers, a vernier protractor, and radius gauges. The combination of these 3 came in handy for complicated parts like the stage 3 cover on the left.
Once all parts were modeled, we performed in depth analyses for materials, process selection, manufacturing, assembly, and cost. We also proposed several design modifications to improve the product.
See full project report here!A model of Stage 3 (Top) and its engineering drawing (Bottom)

-